Getting started#
This is a short tour of MQTT.fx: connect to a broker, subscribe to a topic, publish a message, and look at what comes back. Each step links to a fuller chapter.
The main window#
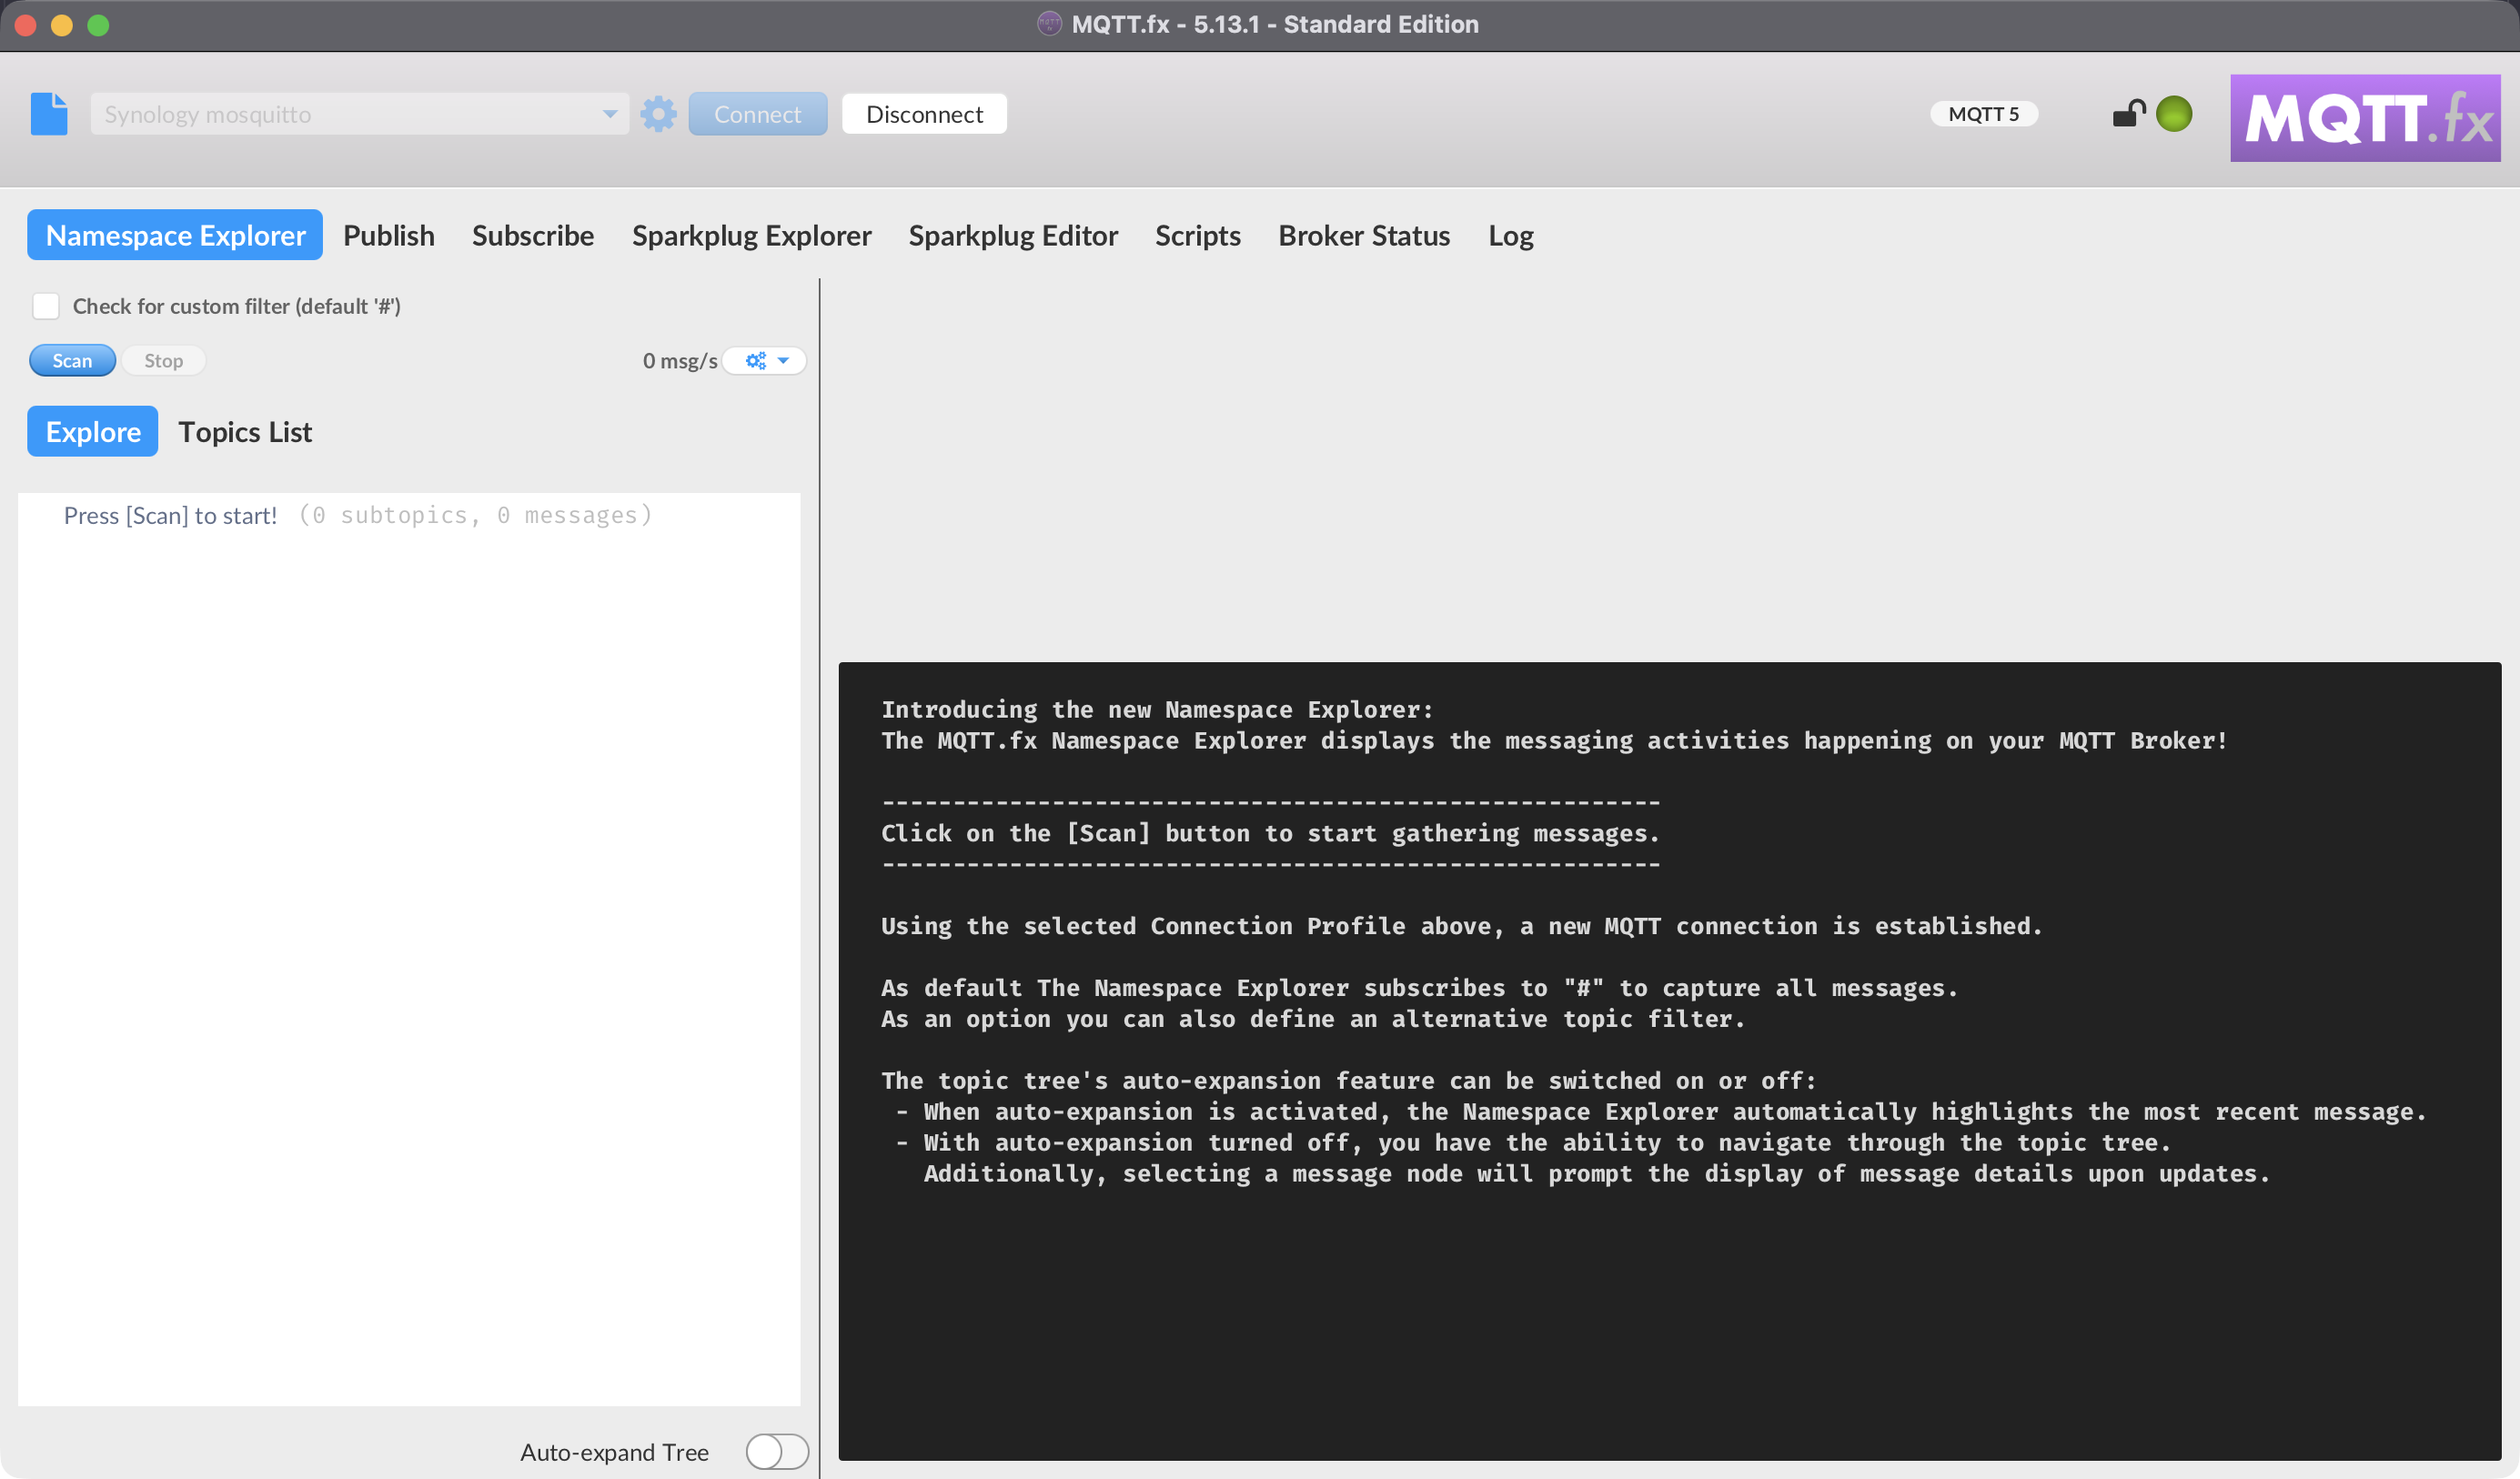
MQTT.fx has a connection bar across the top — where you choose a broker and connect — and a set of tabs below it:
| Tab | Purpose |
|---|---|
| Subscribe | Subscribe to topics and read received messages |
| Publish | Send messages to topics |
| Namespace Explorer | Explore the broker's live topic tree |
| Broker Status | View $SYS broker statistics |
| Scripts | Automate traffic with JavaScript |
| Log | See the application log |
| Sparkplug Explorer / Editor | Work with Sparkplug B (advanced) |
The application menu offers a few extras: this manual is available under Help → User Manual (opens in your browser), updates are checked via Help → Check for Updates, and the license dialog lives under Help → Enter License Key.
A five-minute tour#
- Connect. In the connection bar, switch to ad-hoc mode and enter a broker address (port defaults to
1883), then click Connect — or pick a saved profile. See Your first connection. - Subscribe. On the Subscribe tab, type
#(all topics) and click Subscribe. Incoming messages appear in the list, each on a colored topic. - Look at a message. Select a message to see its payload; the Payload decoded with selector controls how it is shown. See Payloads and formatting.
- Publish. On the Publish tab, enter a topic, type a payload, choose a QoS, and click Publish. If you are still subscribed to
#, you will see your own message arrive. See Publish and subscribe. - Explore. Open the Namespace Explorer and click Scan to watch the broker's topic tree build up live. See Namespace Explorer.
Before you go further#
- For repeatable connections — and for any broker using TLS or authentication — create a connection profile instead of connecting ad-hoc.
- If you are evaluating MQTT.fx without a license, see License and trial for how Demo Sessions and the free trial work.